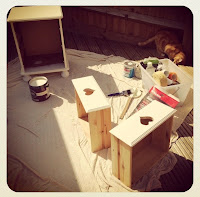
As I mentioned in a previous post, I managed to pick up two bedside cabinets that were being advertised on my local Buying & Selling Facebook page for just £20 - bargain! I knew they were going to need a little work to get them looking perfect for our bedroom so immediately started planning ideas. It took me a little while to get around to actually getting it done as I wanted to wait for some good weather so I could get outside and do it...not sure it's something I would like to be doing in the house.
 |
| Before I began my Upcycling Project |
I began by sanding down the main cabinets whilst Nick cut heart shape holes into the drawers to create the "handles" - cute hey? Then I sanded down the drawers too. I then did two coats of primer/undercoat on each set of drawers. As I used a mini roller for the primer, I wasn't keen on the "bumpy" texture it left...so I sandpapered them again to smooth them over. Finally, I was ready to start painting! We chose Farrow & Ball New White (Number 59) paint as it is neutral so would match any colour scheme we were to go with in the future. After giving the paint a good stir, I applied 2-3 coats of paint with a brush. I did quite thin coats as I didn't want the paint to dry with "drips" in it.
 |
| Humphrey was definitely helping..! |
 |
| Finished Cabinet! |
So after two days of sand papering & painting, I finally finished! What do you think? I'm so pleased with the way they have turned out! I loved doing this project as I was able to take some cheap bedside cabinets and make then look exactly how I wanted! I will definitely consider doing this again in the future. What would you have done if you were to do something similar?
♥
ZoFlo


Love this! So easy and simple but so sweet :)
ReplyDeleteAh thank you! I know, the hearts are so simple but make them look so much better than before :)
Delete